Tuesday, May 10, 2011

Chicks - Week 2: Drawing Chicks

These are our last few days with the chicks.  The children are really involved with observing and documenting their growth and the changes they see.  Here are a few pictures of them drawing the chicks from real life.  This is an important process.  This looks like an art project, but really it is also a scientific process and a pre-writing activity.  Children have to observe closely and pay attention to detail when drawing from real life.  It is a great idea to keep a spiral notebook or other writing notebook with you when you travel in the car, out to eat or to the store.  Ask your child to draw what they see.  People, food, places.  Doing this multiple times at the same place (like the grocery store) shows you how their drawing/writing skills improve with practice.  Drawing and writing are basically the same.  You have to learn how to make lines to form symbols that represent what you see (or to make meaning on paper).  Most of us were raised learning to write by having to write spelling words over and over and over again and dreading it!  During this activity many of the children were independently trying to write or they were finding other ways to use letters to represent and remember their thoughts and feelings.  This is how you raise a child who loves to write, loves words and loves to learn.  This is a very different approach to writing than most of us were raised with.  I hope these pictures help you see how successful, involved and excited these children were about writing and drawing.  Try this at home.  You don't need chickens to do this, just find something that sparks your child's interest.  Even trying to draw Sponge Bob will do!  Then have them draw a real sponge and compare the two.  Just have fun.  Oh, and you have to draw too.  You have to model what you want them to do.  Enjoy the pictures and I threw in one video not related directly to the drawing project just for fun.

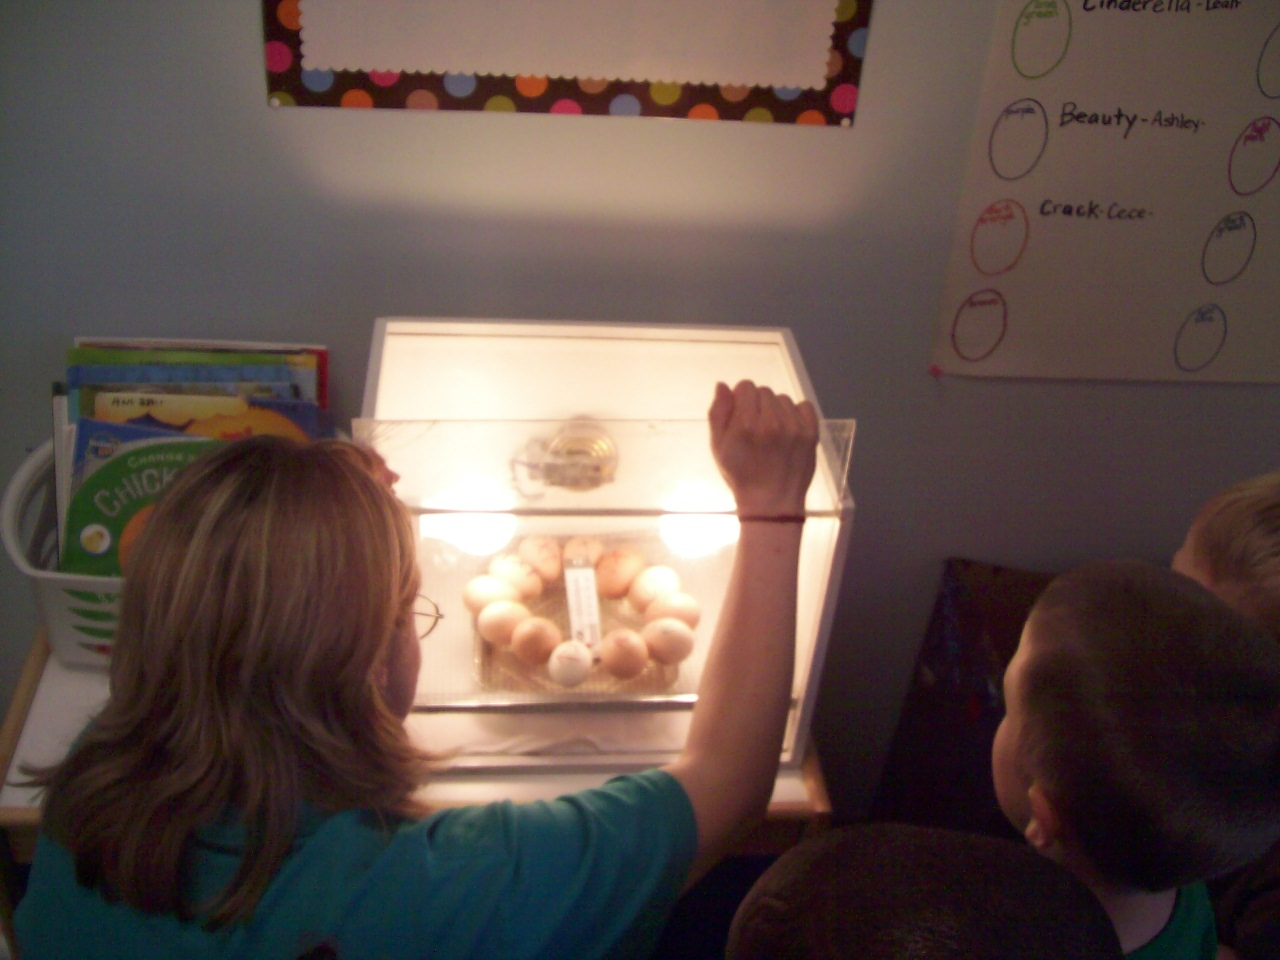
The drawing/writing lesson started out by asking the children to look at how much the chicks had changed over the past week.  They noted that the biggest change was that the chicks were getting feathers and were starting to fly.

For the morning and afternoon classes we placed a few chicks on the table (with newspaper underneath, you know why!) and a laundry basket on top so they could see the chick and gave them paper and crayons.  We asked them to draw what they saw.  Those were the only instructions.  It is best to leave this type of activity as open-ended as possible.

Here the chicks are patiently waiting as the children start the process of drawing what they see. 

Busy hands, busy chicks. 

You can see that different children are at different stages of their writing abilities, but they are all deeply involved in the process.   It IS NOT about the results, it is about them being excited, involved and proud of their efforts that count.
Notice how the children are working side by side without comparison or competition.  Each child could tell us about their picture and what it represented.  Even though the drawing may not have much meaning to you, it has a lot of meaning to the child.  Avoid the standard "that is beautiful" and use more meaningful statements and questions such as "what do you like best about your picture?", "why did you pick those colors for your drawing?", "tell me about this part of your drawing?" and/or "what is you favorite part about your drawing?".  This creates children that are intrinsically motivated to do work and are not working just to get peer or adult praise.  These type of comments and questions show the children you are really connected and encourage children to do work because they enjoy it and find their work meaningful.  This leads to self-motivation and can help keep children from becoming acceptance seekers (which can lead to giving  in to peer pressure as they get older).

During our meeting time at carpet we looked closely at the chicks and compared how many toes they had to how many toes we had.  We took off our shoes and counted.  We looked at a chick and counted.  At first they thought the chicks had three toes, but when they looked closer (on closer investigation is the vocabulary we used with them) they realized that the chicks actually had FOUR toes.  One toe is smaller than the others and is hidden in the back of the foot for balance.  This child remembered that detail and added it into his drawing of the chick.  

This child is proudly showing the chicks their portraits.  A masterpiece I would say, don't you agree?

This child not only started a drawing, but also wanted to write the baby chicks name for him.  Here she is "reading" baby chicks name to him.  She then very proudly hung the picture up on the wall (but then took it down and wanted to take it home).  She independently went and found the foam letters and started writing with crayons and gluing the foam letters on her paper.  This was not part of the lesson, but she felt inspired to do this.  She was allowed, encouraged and supported to explore letters and incorporate her ideas into the "art" lesson.  This is one of the reasons we try to leave the activities open-ended and not give too many instructions.  The children need room to grow and explore, and by expecting every child to turn out cookie cutter type projects (where every project looks the same and it is obvious the teacher did most of the work) it hampers the children's growth and development and can actually keep them from learning as fast as they are naturally capable.


This video shows them exploring the chicks and looking at their wings.  They are also just enjoying being kids and spending time just basking in the wonder of holding something so much smaller than them. 

Monday, May 9, 2011

The Chicke Playground

The children have two loves recently. 
1.  The chickens. 
2.  The block area. 
They have managed to marry the two into a wonderful invention/creation called "The Chickie Playground".  These future architects plan out and build wonderful structures designed to entertain, exercise and delight the chickens (and the children!). 

This adventure started out by one child saying they wanted to build her chick a "home".  Like any good idea it grew from there.  After some discussion (including the teachers having to explain why the two story pretend firehouse was not a good idea to put the baby chicks into and use as a house) the group decided that building something where the chicks could stay close to the ground and couldn't get hurt would be safer.  After all, we do have to follow PAWS LAWS to be Safe, be Responsible and be Kind.  Thus, the idea of a playground was hatched!

The children use a variety of materials to build the playground.  The chick begins to explore!

The children have to use problem solving skills to figure out how to keep the chicks safe (so they cannot build the structure too high).  They also have to make the structure stable so nothing will fall on the chicks.  They also want to keep the chicks inside the structure and on the mat (the chicks do poop and we have to keep everything sanitized) so their previous lessons on perimeter and area came in handy and were put into practical use.

The children sit back and observe how the chick navigates through the playground and they talk about what is working and what they want to do differently when they build the next structure.

The children used a variety of mathematical concepts during this project such as figuring out hiegth and width so the chicks could climb up and walk across sections of the structure.  They had to know how long and how wide to build parts of the playground.  They also needed to estimate how many blocks they would need, what shapes the blocks would need to be and how tall each of the blocks were (measurement concepts) to create different levels.

The children worked on their social skills by working together as a group to create a single structure that would hold several chicks.  This required cooperation, teamwork and preplanning.  This also required them to work on negotiation skills and conflict management when different ideas were in opposition.  They worked together to mesh different ideas into one cohesive idea that all of the children agreed on and created.  Imagine what type of future employees, managers and innovators they will be when they grow up and begin their careers!


Chicks, Part 2: More Video of Hatching

Had to add these.  As always, the kids comments and commentary make it just too adorable! To hear their amazement, their excitement and witness this event through their eyes makes this project unique and precious every year.  It never gets old and it always humbles me.  I hope you enjoy these videos and pictures.  Make sure you watch them with your children and families.  For the next three short videos you need to understand a few things.  One, the children named the eggs/chicks before they hatched.  One chick had just hatched (that chicks name was BABY and belongs to the girl you hear in the video).  The chick that is pipped and is hatching belongs to the boy you hear in the video.  He named his egg/chicken SALAD.  I did not make this up.  He came up with this independently the week before.  I don't know if chicken salad is his favorite sandwich or what, but he was very firm on SALAD for the name.  So, those are the names you hear them saying in the three videos.  Each video is only about a minute long.  Get ready to giggle!


Gentle hands hold a day old baby chick.

New baby chick, meet doll from doll house in block area, doll from doll house, meet new baby chick.  Now, let's play!

Ms. Sarah, our own Mama Chick.  She took all nine baby chicks home this weekend and she and her niece Tina (who volunteers in our classroom when not in class at college) took wonderful care of the babies so they could come back and play with us for another week.  Thank you!

Friday, May 6, 2011

Happy Mother's Day


As a mom I related to this and thought I would share.  I hope you get a good laugh watching this song and we wish you a wonderful Mother's Day!  Relax and enjoy!

Wednesday, May 4, 2011

Welcome Little Chicks

I was sick on Monday so I came in extra early on Tuesday morning wanting to get caught up on a few things.  Actually, I always feel guilty when I am out sick and just feel like I have to get back to work as quickly as possible.  So I arrived at work much earlier than usual.  And all was quiet, except for the sound of chirping................coming.................from...............room.............411.  And when I went into the classroom this is what I saw.


I was so excited!

Was this little guy making all that noise?


We didn't get to watch the process overnight, but we are guessing it looked something like this.  First the process of the chick breaking through the shell, slowly.

Then, after all of that hard work, welcome to the world little chicks!


Chick TV.  All chicks, All the time!


Welcome to Room 411


I wish the video card would not have gotten full before the chick was fully hatched, but you have got to watch this.  The children are amazing.  You have to listen to what they say.  Their observations are so funny.  I hope you enjoy this as much as Ms. Sarah and I did.  We will post more soon. 


Wednesday, April 27, 2011

THE EGGS HAVE ARRIVED!

The eggs have arrived to room 411 direct from the farm!  The children are excited and the teachers are excited. I am not too sure how excited the chicks are yet, but I bet they can't wait to meet us.  We have taken lots of pictures so we can revisit this experience anytime we want to and so all of our friends that have been out sick this week can see what we have been doing while they have been home getting better.  We have lots of pictures to share and some video too.  We hope you enjoy this adventure.  The chicks should hatch in about a week.  Hopefully some of them will wait to hatch until the children are there to witness the event.  If we are lucky enough to be there we will video it and post it on the blog.

Here are the eggs.  Ms. Linda brought these to our classroom.  They came from the farm and had to be kept in this cooler so the eggs would stay warm until we could get them into the incubator.

Here is a close up of one of our eggs.  We are going to candle them so we can see if a baby chick is inside.

Ms. Sarah adds arrows and X's on the eggs so we know which direction to rotate and roll the eggs.  We have to do this 3 to 5 times a day.  The mommy chicken does this when she sits on the eggs at the farm.  This keeps the eggs warm (around 100 degrees).  Ms. Sarah does this since the mommy chicken has to stay at the farm.  The chick eggs have to be rotated under the light bulbs in the incubator so they don't get too hot or too cold.  Ms. Sarah makes a great mommy chicken!

The thermometer lets us know that the incubator is just the right temperature for the eggs.  The pan of water keeps the air moist.  This is just the right environment for the chicks to finish developing until they hatch.


Here are all 12 of our eggs.  Each has a different color X on them so we know which egg belongs to which chick when we candle them.

Ms. Sarah and the children start making the egg chart so we can track and name the chicks in the eggs.

Here is the chart before we name the chicks and candle the eggs.  We hope all 12 eggs have been fertilized and have baby chicks in them.  We will find out very soon.  We will post all of the chicks names when all of our friends are healthy and back to school.  Each child gets to pick a name so we are going to wait until every child gets to name an egg/chick before unveiling the names.

Ms. Sarah gets ready to take us into a dark room with the eggs so we can "candle" them and look inside to see if they have baby chicks in the eggs.  All of the children are very excited.  Some of the children are a little bit confused because they have never done this before.  This is a great learning experience and a wonderful opportunity to expand vocabulary.

Ms. Sarah uses a projector with a very bright light bulb to look inside the egg.  The projector has been modified to make the beam of light very small and focused.


Here is the first video of Ms. Sarah candling the first set of eggs with two children.  The video gets very dark but you can hear great conversation with the children.  If you look closely you can see some movement within the egg.  I have to admit we still find this just as exciting as the children when we get to see the movement of the baby chicks inside the eggs!  In some of the videos you can see the blood vessels also.

The children get up close and are really involved in investigating the egg and the movement inside the egg.  The room is very dark and the children can see inside the egg but the flash on the camera makes it look like the lights are on.  This seems to be the first moment that the children make the connection that something alive is inside the egg and will try to come out soon.


This is the second video.  It is shorter but the excitement shown by the children is priceless!

 
We have rearranged the classroom to create an entire space devoted to the observation and documentation of the egg hatching and baby chick project.  The children have access to books, writing supplies and comfortable seating so they can watch the eggs and hopefully watch them hatch next week.  The children can come over anytime during the day and observe and document their observations.  After the chicks hatch the children will be able to watch the chicks for the next week or two and observe the changes the chicks go through.  We will write more about that in another post.

These children are drawing eggs and writing letters to the baby chicks.  This activity was spontaneous which is what makes this type of learning so important.  These children WANT to write and want to record what they are experiencing and that is what creates lifelong readers and writers.  Writing activities must be meaningful and relevant in order for children to be interested and excited about writing.


This is another example of a child writing.  This child used a book in the egg watching area AFTER he candled an egg to learn more about what was going on inside the egg.  He was doing research to learn more and he did this independently.  This was the page he found and wanted to talk about.  About 30 minutes later he brought this picture to me and asked if he could hang it up on our chick art wall.  Even though he no longer had the book out, I knew immediately what he had drawn!  I was so excited.  Representational drawing is a critical skill children need to develop but often do not have the opportunity to practice.  It will be interesting to see how the children's drawings develop over the next few weeks as they learn more chicks and experience more during this project.  One way we can document how much the children are learning is by observing and gathering evidence showing how much detail is emerging in their drawing/writing.


Welcome to Egg Central.  This is the area we created for the children to observe, record, relax, draw, watch and display their art work/writing.  The children are spending a lot of time in this area.  The area is large enough that all of the children will have room to watch the chicks hatch when the time comes.  I will take pictures of each component of this area and detail what the purpose is as it relates to child development in the next post.
 
In the last picture this child wanted to start creating a new home for the baby chicks when they hatch.  She was very excited to share her building with us.  Even though we could not keep the building and had to explain that the baby chicks would climb out of it, she asked if we could take a picture.  She wants to keep practicing and she wants to make a play house for the baby chickens when they hatch.  We are going to keep working on this project and will keep taking photos and see where this leads for this child.


Thursday, April 21, 2011

Don't Throw Away Those Plastic Eggs!

http://www.geekyhousewife.com/2008/03/14/50-uses-for-plastic-easter-eggs/

Are you wandering what you are going to do with all those plastic Easter eggs? Surprisingly, there are many uses for plastic Easter eggs. Here are 50 suggestions:

1. Putting prizes in for egg hunts.
2. Use to hold paint if eggs do not have holes in them.
3. Store pantyhose. (larger eggs. remember when pantyhose used to come in eggs?)
4. Keep necklaces from getting tangled by placing one in an egg. Great for travel.
5. Packing material.
6. Make an egg duck.
7. Or how about a plastic egg bunny.
8. Grab some glue, beads, and ribbon. Decorate eggs and then display in a nice basket.
9. Try felted Easter eggs.
10. Make your own play dough and store it in plastic eggs.
11. Try a Dinosaur Excavation eggs for a fun project.
12. Decorate eggs with faces. Glue craft stick to egg and put on a puppet show.
13. Stuff with potpourri and use as an air freshener. Either puncture holes in eggs or use eggs that already have small holes.
14. String eggs together to create garland for a fireplace mantle or table centerpiece.
15. Saving receipts? Place important receipts for big ticket purchases in eggs for safe storage.
16. Store special coins. This way you are less likely to accidentally spend that state quarter or wheat penny.
17. Glue eggs halves around a plain picture frame to create a one-of-a-kind frame that is perfect for holding that egg hunt picture.
18. Store craft beads. Keep organized by color.
19. Use it to keep eye shadow brushes clean and easily accessible.
20. Keep plastic eggs to use in conjunction with gifts. Put tiny trinkets until the eggs for an added surprise for the recipient.
21. Use sand in plastic eggs when you need to weigh down a gift bag to keep it from tipping over.
22. Keep small eyeglasses screwdriver and screws since it’s much easier to find a brightly colored plastic egg in a junk drawer than a small screwdriver.
23. Place fingernail clippers inside because it will be easier to find when you need it.
24. Use eggs to help younger kids learn to count.
25. Learning tool to learn colors as well. or combine games(give me the blue egg, or give me two pink eggs)
26. Fill eggs with different materials like dirt, rocks, etc. Have children try to guess what each egg holds.
27. Have children race with a plastic egg in a spoon. If they drop the egg, then they are out of the race. Usually done with real eggs but fill plastic eggs with water or dirt to give them a little weight.
28. Another racing game is to have kids push a plastic egg with their nose to the finish line.
29. Form a line and have each person pass the egg to the next person without using their hands. See how far it can be passed before it’s dropped.
30. Play croquet. Take a plastic bat and tap the plastic eggs around the yard, trying to steer eggs through the scoring goals.
31. Mismatch eggs and then have children race to place the eggs back to one color.
32. Hide one prize in an egg. Then quiz kids on various subjects. When they get a question right, they get to choose an egg. Game is over when the special egg is found.
33. Place in a basket for decoration.
34. Convert your Christmas tree into an Easter tree. Take ribbon and hang plastic eggs on tree.
35. Use half an egg to scoop sand or take to beach to build sandcastles.
36. Add plastic eggs to ball pit or make your own by tossing them into an empty, small swimming pool.
37. Keep loose buttons in them.
38. Pack some thread and a needle in one for a travel sewing kit.
39. Keep loose change organized on a dresser or in your car by placing it in eggs.
40. Fill eggs with sand to create your own weights for use during workouts. Plug any holes in eggs first.
41. Weight down eggs with dirt or sand and use in flower garden as decoration
42. Keep small parts to board games(like Monopoly pieces: shoe, horse, etc.) so you don’t lose them.
43. Place cotton balls in eggs. Takes up little space and keeps them clean.
44. Keep an egg in your purse to hold loose change.
45. Use a plastic egg to hold one serving size of your favorite candy. This way you can have a little treat guilt free.
46. Keep band-aids in eggs when traveling or in your purse.
47. Place jewelry that you plan to wear with each outfit into separate eggs. It will keep it together and well organized.
48. Place small media cards inside eggs to protect them as well as to be able to find them fast.
49. Do you work on computers? Place those small screws inside a plastic egg and never lose one again.
50. Donate plastic eggs to a church or organization that sponsors a community egg hunt.